The Blood of Dawnwalker A Deal with the Devil — Endgame Quest Walkthrough — Wiki & Guide
Published 2026-09-216 min read
A Deal with the Devil walkthrough: Brencis's midnight parley at Shrike's Crag, the brazier signal, every dialogue branch, the ghoul ambush, and how to mark the Liberators' hideout.
A Deal with the Devil is the endgame audience with Brencis — the quest card that fires once the three boyars of Vale Sangora are dust and your Infamy has climbed high enough. It is a trap, an invitation, and the doorway to two of the game's main endings: take the bargain and become The Turncoat, or draw your sword and claim The Folk Hero.
How to start
- Defeat all three boyars — Ambrus, Bakir and Xanthe — and push your Infamy to its peak.
- Skip ahead to the next day and Brencis summons you to a final audience: A Deal with the Devil.
- The quest costs about 4 time segments, and the 30-day limit still runs underneath it — do not start the finale with your family's clock nearly empty.
- Make a manual save before the meeting. After one ending plays out you return to the main menu with no free-roam, so the save is your ticket back in to unlock the other endings.
Light the fire signal
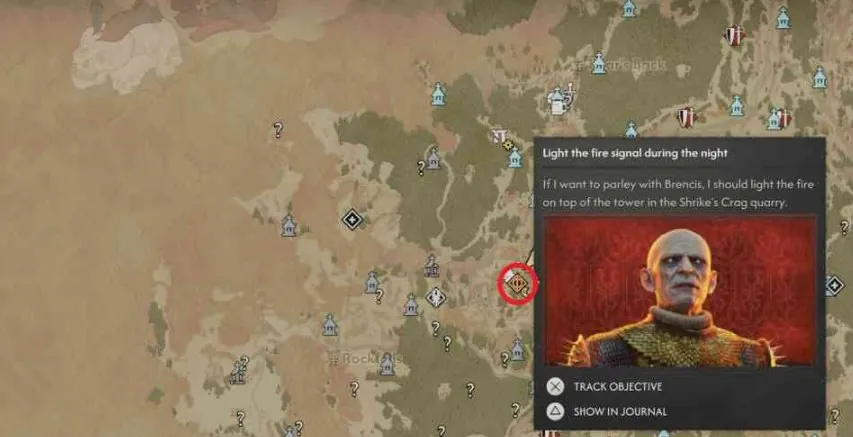
The meeting point is the quarry at Shrike's Crag, west of Svartrau, and it only happens at night. Climb the tower, interact with the metal brazier, and light the signal fire. Brencis appears and the conversation opens.
The first three dialogue rounds are free — answer however you like. Everything hinges on the fourth:
- Choose "Draw your sword" and the boss fight starts immediately. Kill Brencis here and you trigger The Folk Hero ending; the fight itself plays out exactly like the Brencis duel from the Lone Wolf hunt line.
- To take the deal, keep talking and pick the compromise line each round:
- "I only want my family back."
- "That sounds… reasonable." (or the equally accommodating alternative)
- "I agree." / "I'll think about it."
- "So be it."
Save Pieter from the ghouls
The parley ends and the quarry floods with ghouls. Fight alongside Brencis to clear them, then head to the area's entrance where Pieter is waiting. Dialogue with Pieter and Brencis here is consequence-free — pick what feels right.
Find and mark the Liberators' hideout
The deal isn't done until you sell out the people fighting Brencis:
- If you haven't already joined the Liberators, push Crake's chain — The Firebrand → Shadows in the Woods → the missions that follow — until you are one of them.
- Once you're in, the hideout gate gains a quest marker at night.
- Interact with the gate to mark the hideout and trigger the ending cutscene.
The epilogue
Every ending funnels into the same epilogue back at Laslea Glen. Follow the markers, talk to the villagers, check the forest traps, and head into the cave for the final scenes. The epilogue's dialogue choices don't change anything.
Two things matter here:
- Uphill Battle and In the Nick of Time only unlock if you watch the epilogue all the way through the credits — they do not pop at its opening.
- When the credits end you are dumped at the title screen. Load the manual save you made before the parley to chase the other endings.
Keep reading: